

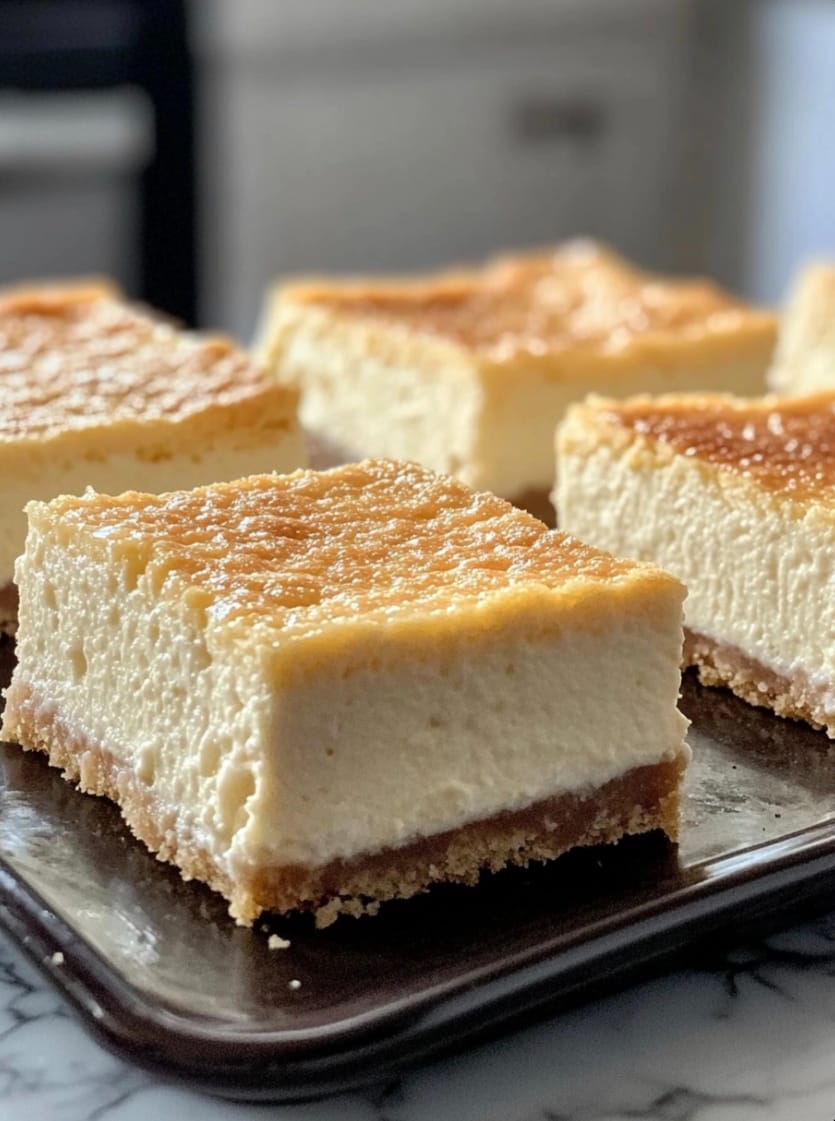
Rice Krispie Cheesecake is a fun twist on the classic cheesecake, combining the creamy, rich filling you love with a crunchy Rice Krispie crust. This no-bake dessert is perfect for parties, potlucks, or any time you want a treat that’s both nostalgic and indulgent. The crispy crust adds a delightful contrast to the smooth cheesecake filling, making it a hit with kids and adults alike.
Table of Contents
- Introduction
- Ingredients
- Step-by-Step Instructions
- Cook Notes & Tips
- Variations
- Frequently Asked Questions (FAQs)
- Conclusion
Ingredients
For the Rice Krispie Crust
- 4 cups Rice Krispies cereal
- 1/2 cup unsalted butter
- 1 (10-ounce) bag mini marshmallows
For the Cheesecake Filling
- 16 ounces cream cheese, softened
- 1 cup powdered sugar
- 1 teaspoon vanilla extract
- 1 1/2 cups heavy cream, cold
For the Topping (optional)
- Fresh berries
- Chocolate shavings
- Whipped cream
Step-by-Step Instructions
Step 1: Make the Rice Krispie Crust
- In a large saucepan, melt the butter over medium heat. Add the mini marshmallows and stir until completely melted and smooth.
- Remove from heat and immediately stir in the Rice Krispies cereal, mixing until evenly coated.
- Press the mixture into the bottom of a greased 9-inch springform pan, using a spatula or your hands to create an even layer. Let the crust cool and set for about 15-20 minutes.
Step 2: Prepare the Cheesecake Filling
- In a large mixing bowl, beat the softened cream cheese, powdered sugar, and vanilla extract until smooth and creamy.
- In a separate bowl, whip the heavy cream until stiff peaks form.
- Gently fold the whipped cream into the cream cheese mixture until well combined and fluffy.
Step 3: Assemble the Cheesecake
- Spoon the cheesecake filling over the cooled Rice Krispie crust, spreading it evenly with a spatula.
- Cover the pan with plastic wrap and refrigerate for at least 4 hours, or until the cheesecake is firm and set.
Step 4: Add Toppings and Serve
- Once set, remove the cheesecake from the springform pan and transfer it to a serving plate.
- Top with fresh berries, chocolate shavings, or whipped cream if desired.
- Slice and serve chilled.
Cook Notes & Tips
- Pressing the Crust: Use a piece of parchment paper or wax paper to help press the sticky Rice Krispie mixture into an even layer without it sticking to your hands.
- Chilling Time: Be sure to chill the cheesecake long enough for it to fully set, at least 4 hours or overnight for best results.
- Cutting the Cheesecake: Use a sharp knife dipped in hot water to get clean slices. Wipe the knife between each cut.
Variations
- Chocolate Rice Krispie Crust: Add 1/4 cup of cocoa powder to the marshmallow mixture for a chocolate-flavored crust.
- Peanut Butter Cheesecake: Add 1/2 cup of peanut butter to the cream cheese mixture for a rich peanut butter flavor.
- Fruit Swirl Cheesecake: Swirl in a few tablespoons of fruit preserves (such as raspberry or strawberry) into the cheesecake filling before chilling.
Frequently Asked Questions (FAQs)
1. Can I Make This Cheesecake Ahead of Time?
Yes, this cheesecake can be made up to 2 days in advance. Just keep it covered in the refrigerator until ready to serve.
2. How Should I Store Leftovers?
Store any leftover cheesecake in an airtight container in the refrigerator for up to 5 days.
3. Can I Freeze Rice Krispie Cheesecake?
Yes, you can freeze the cheesecake. Wrap it tightly in plastic wrap and foil, and freeze for up to 2 months. Thaw in the refrigerator before serving.
4. Can I Use a Different Cereal for the Crust?
Absolutely! You can use other cereals like Cocoa Krispies, Cornflakes, or even crushed graham crackers for a different twist.
Rice Krispie Cheesecake is a delightful combination of creamy cheesecake and a crunchy, nostalgic crust. This no-bake dessert is easy to make and perfect for any occasion, adding a fun twist to a classic favorite. Whether topped with berries or enjoyed as is, this cheesecake is sure to bring smiles to everyone who tries it.
Happy baking!



Just wanted to drop a quick note saying this was a useful read on a topic I have been circling, no fluff, and a stop at blog44follow added a few extra points that fit the same simple style which makes the whole site feel coherent rather than thrown together by many different writers with different goals.
Just nice to read something that does not feel like it was assembled from a content brief, and a stop at kryvoxpoint kept that handcrafted feel going, you can tell when a real human with real understanding is behind the words versus a templated piece churned out for an algorithm to find.
Found the use of subheadings really helpful for scanning back through the post later, and a stop at blog44fours kept that reader friendly approach going, navigation is something many blog writers ignore but small structural choices make a noticeable difference for someone returning to find a specific point again days or weeks later.
chicken road error al iniciar sesión https://chicken-road96975.shop/
Just want to acknowledge that the writing here is doing something right, and a quick visit to kryvoxpoint confirmed the same standards run across the broader site, recognising good work is something I try to do when I find it because the alternative is silence and silence rewards mediocrity.
Easy to recommend without reservations, the site delivers on every promise it implicitly makes, and a look at fastfood3 kept that same standard going, the kind of consistency that earns trust over time rather than chasing it through aggressive marketing is what I see here and it is appreciated greatly by this particular reader today.
Thank you for keeping the writing honest and the points easy to verify against your own experience, and a stop at blog44follow reflected the same approach, no exaggeration just steady useful content that I can take with me into my own work without second guessing every sentence I happen to read here.
mostbet доступ к сайту https://mostbet49411.shop/
chicken road depositar con skrill http://chicken-road96975.shop
chicken road bono aviator http://chicken-road96975.shop/
mostbet-kg https://mostbet49411.shop
chicken road inicio sesion es chicken road inicio sesion es
chicken road kyc https://chicken-road03434.shop/
chicken road app en espanol chicken-road94576.shop
chicken road plinko app chicken road plinko app
chicken road slots android https://www.chicken-road03434.shop
как играть в plinko мостбет как играть в plinko мостбет
mostbet neplatná karta http://www.mostbet94227.shop
chicken road bono mensual https://www.chicken-road50980.shop
mostbet регистрация бонус Кыргызстан http://www.mostbet32904.shop
chicken road espana login chicken road espana login
mostbet rychlý výběr http://www.mostbet79380.shop
chicken road retirar ganancias chicken road retirar ganancias
mostbet česko výběr https://www.mostbet79380.shop
mostbet web http://mostbet79380.shop
mostbet live sázky tenis https://mostbet79380.shop
mostbet обновить приложение mostbet обновить приложение
chicken road reembolso chicken road reembolso
chicken road pagina http://www.chicken-road50980.shop
mostbet vytvořit účet http://mostbet79380.shop/
chicken road bono sin deposito españa https://chicken-road50980.shop/
chicken road link mirror http://chicken-road50980.shop/
chicken road retiro instantaneo chicken road retiro instantaneo
мостбет Каракол https://www.mostbet32904.shop
mostbet бонус на сегодня mostbet32904.shop
мостбет быстрые платежи мостбет быстрые платежи
chicken road aviator descargar https://chicken-road12219.shop/
chicken road entrar sitio oficial https://chicken-road12219.shop/
vavada crash demo vavada55365.shop
melbet ставки на спорт melbet40143.shop
melbet актуальное зеркало melbet40143.shop
pinco lənkəran https://pinco50897.shop
melbet aviator signal app http://melbet57811.shop/
мелбет изменить номер телефона https://melbet40143.shop/
pinco azərbaycan app https://pinco50897.shop/
pinco slot turniri http://pinco50897.shop/
melbet crash bonus melbet crash bonus
mostbet rejestracja kasyno https://mostbet72836.shop/
chicken road promotion https://www.chicken-road61210.shop
pinco rəsmi sayt linki https://www.pinco50897.shop