
There’s something undeniably comforting about a freshly baked pie, especially when it’s filled with sweet and tart apples nestled in a flaky crust. This Crazy Crust Apple Pie takes traditional apple pie to new heights with its unique crust that’s both easy to make and incredibly delicious. Originating from classic American desserts, this recipe is not only simple but also perfect for showcasing the best apples for baking. The cake-like crust forms beautifully around the succulent apple filling, creating a delightful texture contrast. Whether you’re preparing for a family gathering or simply craving a slice of comfort food, this pie will surely impress. There’s something about the aroma of apples and cinnamon wafting through your kitchen that makes this dish feel like a warm hug, inviting everyone to gather around the table.
Ingredients
- For the crust:
- 1 cup all-purpose flour
- 1 teaspoon sugar
- 1/2 teaspoon salt
- 1/2 cup unsalted butter, melted
- 2 large eggs
- For the filling:
- 6 cups apples, peeled, cored, and sliced (a mix of sweet and tart apples works best)
- 3/4 cup sugar
- 1 tablespoon lemon juice
- 2 teaspoons cinnamon
- 1/4 teaspoon nutmeg (optional)
- 2 tablespoons all-purpose flour
For the best results, use a combination of Granny Smith and Honeycrisp apples to achieve that perfect balance of sweet and tart flavors. Granny Smith apples bring a sharpness that cuts through the sweetness, while Honeycrisp apples add juiciness and crunch. If you want to make it easier, feel free to use pre-sliced apples from your local market. You can even mix in some tart cherries or cranberries for a festive twist. You can learn more about this topic.
Steps / Instructions
- Prepare the oven: Preheat your oven to 350°F (175°C). This temperature is key for baking the pie evenly without burning the crust.
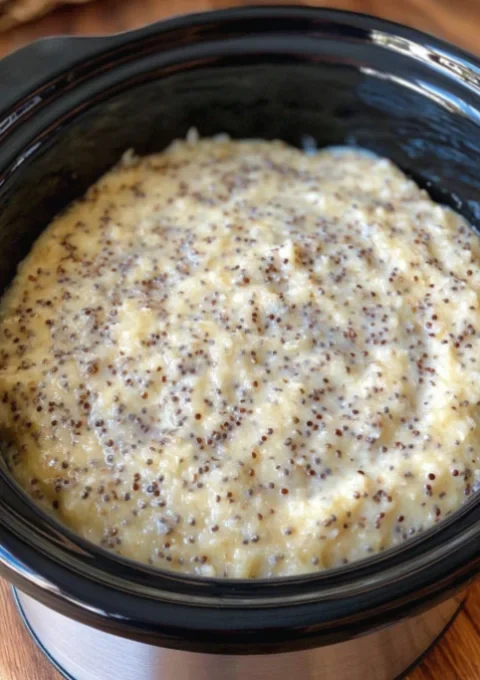
- Make the crust: In a mixing bowl, combine 1 cup of all-purpose flour, 1 teaspoon of sugar, and 1/2 teaspoon of salt. Stir until blended. Make sure there are no lumps, as this will help create a smooth texture.
- Add butter and eggs: Pour in the melted butter and add the two large eggs. Mix until you have a smooth, thick batter. This will be your crust base, which should have a pourable consistency but still hold its shape.
- Prepare the filling: In a separate bowl, combine the sliced apples, 3/4 cup of sugar, 1 tablespoon of lemon juice, 2 teaspoons of cinnamon, and, if desired, the nutmeg and 2 tablespoons of flour. Toss until the apples are evenly coated. The flour will help thicken the juices released by the apples during baking.
- Assemble the pie: Spread half of the crust batter evenly in the bottom of a greased 9-inch pie pan. Layer the apple filling over the crust, spreading it out evenly. Spoon the remaining crust batter over the top of the apples, leaving some parts exposed for a rustic look. This exposed surface will caramelize nicely during baking.
- Bake the pie: Place the pie in the preheated oven and bake for 45-50 minutes, or until the top is golden brown and the filling is bubbly. Keep an eye on the pie to ensure it doesn’t over-bake, as ovens can vary in temperature. If the edges brown too quickly, cover them with foil to prevent burning.
- Cool and serve: Once baked, remove the pie from the oven and allow it to cool for at least 30 minutes before slicing. This cooling period helps the filling set up nicely, making it easier to serve and enhancing the flavors.
Tips & Tricks
To make your Crazy Crust Apple Pie a success, consider these tips: Check out our related guide for more tips. These insights can elevate your pie-making experience and ensure a delicious outcome every time.
- Storage: Store leftover pie in the refrigerator for up to 3 days. Reheat individual slices in the microwave for a few seconds to enjoy a warm dessert. Alternatively, you can warm slices in the oven at 350°F (175°C) for about 10 minutes for a more evenly heated result.
- Make-ahead options: You can prepare the apple filling a day in advance and store it in the refrigerator until you’re ready to assemble and bake the pie. This not only saves time but allows the flavors to meld beautifully.
- Common mistakes to avoid: Ensure your apples are firm and not overly ripe; mushy apples can lead to a soggy pie. Additionally, don’t skip the cooling time, as it allows the filling to thicken properly, resulting in a more cohesive slice when served.
- Pro techniques: For a more pronounced flavor, consider adding a splash of vanilla extract to your apple filling. You might also experiment with spices like allspice or cardamom for an aromatic twist.
Conclusion
With its delightful combination of sweet and tart apple flavors and the ease of preparation, this Crazy Crust Apple Pie is a must-try for any dessert lover. Its rustic charm makes it perfect for autumn gatherings, family dinners, or simply treating yourself to a slice of homemade goodness. Gather your ingredients and enjoy the comforting embrace of this classic dessert with a twist! The joy of sharing a homemade pie is unmatched, so don’t forget to invite friends and family to enjoy this delicious treat with you.

Crazy Crust Apple Pie
Course: Dinner Cuisine: American Difficulty: Easy
🍽️Servings—
⏱️Prep Time15 min
🍳Cook Time50 min
🔥Calories—There’s something undeniably comforting about a freshly baked pie, especially when it's filled with sweet and tart apples nestled in a flaky crust. This Crazy Crust Apple Pie takes traditional apple pie to new heights with its unique crust that’s both easy to make and incredibly delicious. Originating from classic American desserts, this recipe is not only simple but also perfect for showcasing the best apples for baking. The cake-like crust forms beautifully around the succulent apple filling, creating a delightful texture contrast.
Cook Mode Keep the screen of your device onIngredients
-
1 cup all-purpose flour
-
1 teaspoon sugar
-
1/2 teaspoon salt
-
1/2 cup unsalted butter, melted
-
2 large eggs
-
6 cups apples, peeled, cored, and sliced (a mix of sweet and tart apples works best)
-
3/4 cup sugar
-
1 tablespoon lemon juice
-
2 teaspoons cinnamon
-
1/4 teaspoon nutmeg (optional)
-
2 tablespoons all-purpose flour
Directions
1.Preheat your oven to 350°F (175°C). This temperature is key for baking the pie evenly without burning the crust.
2.In a mixing bowl, combine 1 cup of all-purpose flour, 1 teaspoon of sugar, and 1/2 teaspoon of salt. Stir until blended. Make sure there are no lumps, as this will help create a smooth texture.
3.Pour in the melted butter and add the two large eggs. Mix until you have a smooth, thick batter. This will be your crust base, which should have a pourable consistency but still hold its shape.
4.In a separate bowl, combine the sliced apples, 3/4 cup of sugar, 1 tablespoon of lemon juice, 2 teaspoons of cinnamon, and, if desired, the nutmeg and 2 tablespoons of flour. Toss until the apples are evenly coated. The flour will help thicken the juices released by the apples during baking.
5.Spread half of the crust batter evenly in the bottom of a greased 9-inch pie pan. Layer the apple filling over the crust, spreading it out evenly. Spoon the remaining crust batter over the top of the apples, leaving some parts exposed for a rustic look. This exposed surface will caramelize nicely during baking.
6.Place the pie in the preheated oven and bake for 45-50 minutes, or until the top is golden brown and the filling is bubbly. Keep an eye on the pie to ensure it doesn’t over-bake, as ovens can vary in temperature. If the edges brown too quickly, cover them with foil to prevent burning.
7.Once baked, remove the pie from the oven and allow it to cool for at least 30 minutes before slicing. This cooling period helps the filling set up nicely, making it easier to serve and enhancing the flavors.
Recipe Reviews
- ★★★★★
Excellent recipe!
Leave a Reply
Your email address will not be published. Required fields are marked *

Crazy Crust Apple Pie
There’s something undeniably comforting about a freshly baked pie, especially when it's filled with sweet and tart apples nestled in a flaky crust. This Crazy Crust Apple Pie takes traditional apple pie to new heights with its unique crust that’s both easy to make and incredibly delicious. Originating from classic American desserts, this recipe is not only simple but also perfect for showcasing the best apples for baking. The cake-like crust forms beautifully around the succulent apple filling, creating a delightful texture contrast.
Ingredients
- 1 cup all-purpose flour
- 1 teaspoon sugar
- 1/2 teaspoon salt
- 1/2 cup unsalted butter, melted
- 2 large eggs
- 6 cups apples, peeled, cored, and sliced (a mix of sweet and tart apples works best)
- 3/4 cup sugar
- 1 tablespoon lemon juice
- 2 teaspoons cinnamon
- 1/4 teaspoon nutmeg (optional)
- 2 tablespoons all-purpose flour
Directions
Preheat your oven to 350°F (175°C). This temperature is key for baking the pie evenly without burning the crust.
In a mixing bowl, combine 1 cup of all-purpose flour, 1 teaspoon of sugar, and 1/2 teaspoon of salt. Stir until blended. Make sure there are no lumps, as this will help create a smooth texture.
Pour in the melted butter and add the two large eggs. Mix until you have a smooth, thick batter. This will be your crust base, which should have a pourable consistency but still hold its shape.
In a separate bowl, combine the sliced apples, 3/4 cup of sugar, 1 tablespoon of lemon juice, 2 teaspoons of cinnamon, and, if desired, the nutmeg and 2 tablespoons of flour. Toss until the apples are evenly coated. The flour will help thicken the juices released by the apples during baking.
Spread half of the crust batter evenly in the bottom of a greased 9-inch pie pan. Layer the apple filling over the crust, spreading it out evenly. Spoon the remaining crust batter over the top of the apples, leaving some parts exposed for a rustic look. This exposed surface will caramelize nicely during baking.
Place the pie in the preheated oven and bake for 45-50 minutes, or until the top is golden brown and the filling is bubbly. Keep an eye on the pie to ensure it doesn’t over-bake, as ovens can vary in temperature. If the edges brown too quickly, cover them with foil to prevent burning.
Once baked, remove the pie from the oven and allow it to cool for at least 30 minutes before slicing. This cooling period helps the filling set up nicely, making it easier to serve and enhancing the flavors.
Recipe Reviews
- ★★★★★
Excellent recipe!
Leave a Reply
Your email address will not be published. Required fields are marked *


Excellent recipe!