

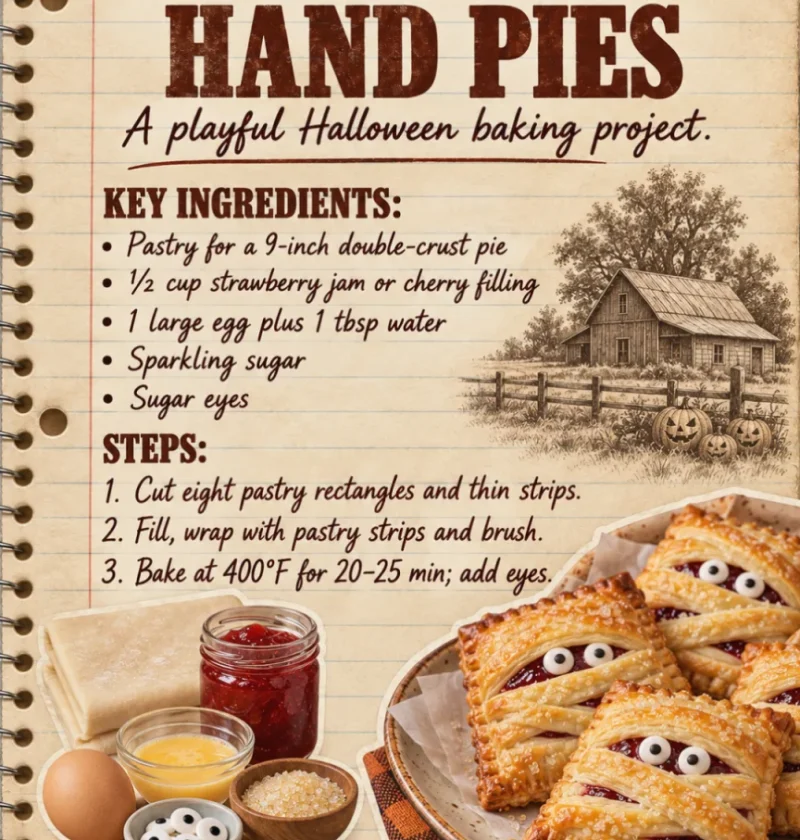
Halloween is a time for fun, creativity, and delicious treats, and what better way to celebrate than with Easy Mummy Hand Pies? These delightful pastries not only look impressive but are also simple to make, making them perfect for family gatherings, school parties, or a festive Halloween dinner. Encased in flaky pastry dough and filled with a savory filling, these hand pies are reminiscent of classic hand-held treats but with a spooky twist. As you cut the dough to create bandage-like strips, the end result is a fun dish that kids and adults alike will enjoy. Plus, you can customize the filling to match your tastes, making them versatile and satisfying. The allure of these hand pies lies not just in their presentation, but also in their flavor and the nostalgia they evoke, making them a must-try for any Halloween celebration. These hand pies are sure to be the highlight of your Halloween festivities!
Ingredients
Pastry Dough
- 2 ½ cups all-purpose flour
- 1 teaspoon salt
- 1 cup unsalted butter, cold and cut into cubes
- 6–8 tablespoons ice water
Filling
- 1 cup cooked and shredded chicken (or your choice of protein)
- ½ cup shredded cheese (cheddar, mozzarella, or cheese of your choice)
- ½ cup pumpkin puree (for a festive twist)
- 1 teaspoon garlic powder
- 1 teaspoon onion powder
- Salt and pepper to taste
For Assembly
- 1 egg, beaten (for egg wash)
- Black olives (for eyes)
Steps / Instructions
- Make the Pastry Dough: In a large mixing bowl, combine the flour and salt thoroughly to ensure an even distribution. Add the cold, cubed butter and mix using a pastry cutter or your fingers until the mixture resembles coarse crumbs, about the size of peas. This coarse texture is important for achieving flakiness, which is the hallmark of a great hand pie. Gradually add the ice water, one tablespoon at a time, mixing until the dough comes together. The goal is for the dough to hold its shape without being sticky, which ensures a good texture. If the mixture appears too dry, you can add an extra tablespoon of water, but be cautious not to overdo it. Divide the dough in half, flatten into disks, wrap in plastic, and refrigerate for at least 1 hour. Chilling the dough is essential for achieving that perfect flaky texture, as it allows the gluten to rest and the butter to firm up, resulting in a tender yet crisp pastry.
- Prepare the Filling: In a medium bowl, combine the cooked chicken, shredded cheese, pumpkin puree, garlic powder, onion powder, salt, and pepper. Mix well until all ingredients are thoroughly combined and evenly distributed, ensuring each bite is flavor-packed. For the chicken, you can use rotisserie chicken for a quick option or grill your chicken breasts and shred them at home. If you’re using a different protein, make sure it’s pre-cooked and seasoned to your liking, as this will enhance the overall flavor profile. Don’t hesitate to add a splash of hot sauce or some herbs for a unique twist! Set aside the filling while you work on the dough, allowing the flavors to meld slightly, which can enhance the overall taste.
- Preheat the Oven: Preheat your oven to 400°F (200°C). Line a baking sheet with parchment paper to prevent sticking and facilitate easy cleanup. This step is crucial as it allows the hand pies to bake evenly and develop a golden crust. You can also place a cooling rack on top of the baking sheet for even better airflow, which can help create a crispier bottom. Remember, a properly preheated oven ensures that your pies cook evenly, so don’t skip this step!
- Roll Out the Dough: On a lightly floured surface, roll out one disk of pastry dough to about ⅛ inch thick. Be careful not to overwork the dough to maintain its flaky quality. Ideally, you want to roll it out evenly to avoid any thick spots. Cut out circles using a cookie cutter or a glass, about 4 inches in diameter. Gather any scraps, re-roll, and cut out more circles until all dough is used. Remember, the thickness of the dough is key; too thick will result in a doughy pie, while too thin may break during baking. Aim for uniform circles to ensure even cooking and presentation.
- Fill the Pies: Place about 2 tablespoons of the filling in the center of each circle. Be careful not to overfill, as you want to seal the edges properly to prevent leaks during baking. Gently spread the filling, leaving a small border around the edge to ensure a good seal. This small border is critical; if your filling touches the edge, it may not seal correctly and can ooze out during baking. Take your time to position the filling just right for optimal texture and taste.
- Create the Mummy Effect: Roll out the second disk of dough in the same way, then cut it into thin strips to create the “bandages.” Aim for strips about ½ inch wide. These strips should vary in length and placement for a more realistic mummy effect. Place a few strips over each filled circle, leaving gaps for “eyes.” The randomness of the strips can make your hand pies look more authentic and spooky, creating a fun visual that is sure to delight your guests and make these Easy Mummy Hand Pies a talking point at any Halloween gathering.
- Seal and Brush: Press the edges of the pies together gently but firmly to seal. Use a fork to crimp the edges for added decoration and to ensure they are well sealed. This crimping not only helps to secure the filling but also gives a nice decorative touch to the pies. Brush the tops with the beaten egg for a golden finish and a shiny appearance once baked. The egg wash is an important step to achieve that appealing golden-brown color; it also adds a nice sheen that enhances the visual appeal of your pies.
- Add the Eyes: Cut small circles from the black olives and place them in the gaps between the strips to create eyes. This adds a fun and creepy touch to your Easy Mummy Hand Pies, perfect for Halloween-themed gatherings. You can also use small bits of cream cheese or mozzarella as eyeballs for a different look! The eyes are a critical detail that brings your mummy pies to life, so don’t rush this step.
- Bake the Hand Pies: Place the hand pies on the prepared baking sheet and bake in the preheated oven for 20–25 minutes or until the crust is golden brown and flaky. Keep an eye on them during the last few minutes of baking to prevent over-browning. If you notice that they are browning too quickly, you can cover them loosely with aluminum foil to protect the tops. The scent of baking hand pies will fill your kitchen, making it even harder to wait for them!
- Cool and Serve: Once baked, remove from the oven and let cool slightly on a wire rack. This cooling step helps the filling to set up a bit more and makes them easier to handle. Serve warm or at room temperature, and enjoy your festive Easy Mummy Hand Pies! They are best enjoyed fresh but can be reheated. If reheating, consider placing them back in the oven to retain their crispiness; a microwave may soften the pastry and change its delightful texture.
Tips & Tricks
- Make-Ahead: You can prepare the pastry dough a day in advance and keep it in the refrigerator. This allows the flavors to meld and the dough to chill effectively, ensuring a flaky crust. You can also assemble the pies before the event and bake them just before serving for a warm treat. For even more convenience, consider freezing unbaked hand pies. Just freeze them in a single layer before transferring them to a freezer bag, and bake directly from frozen, adding a few extra minutes to the baking time. This flexibility is great for busy schedules!
- Storage: Store any leftovers in an airtight container in the refrigerator for up to 3 days. Reheat them in the oven for about 10 minutes to restore crispiness, as microwaving can make the crust soggy. If you have a large batch, they also freeze well after baking and can be reheated in the oven when needed. Consider labeling your containers with dates to keep track of their freshness.
- Common Mistakes: Ensure the butter is cold when making the dough. This is crucial for achieving a flaky texture. Also, don’t forget to seal the edges well to prevent any leakage during baking. A poorly sealed pie can lead to a messy oven and a less satisfying filling. Additionally, be mindful of the baking time; underbaking can result in a soggy crust, while overbaking can cause dryness. Always check a minute or two before the time is up to gauge doneness.
- Pro Techniques: For extra flavor in the filling, consider adding herbs like thyme or rosemary. You might also experiment with different cheeses to find your favorite combination, such as adding a bit of feta for a tangy twist. If you want a spicier kick, finely diced jalapeños or a dash of hot sauce can be added to the filling as well. Consider mixing in sautéed vegetables like spinach or bell peppers for added nutrition and color as well! These tweaks can elevate your Easy Mummy Hand Pies to a whole new level of deliciousness.
Conclusion
Now that you have the recipe for Easy Mummy Hand Pies, you can impress your family and friends with this fun and delicious treat. Ideal for Halloween or any festive occasion, these hand pies are sure to become a beloved addition to your savory hand pie recipes collection. With their flaky pastry and delectable filling, they make excellent quick lunch ideas or kid-friendly snacks. Customize them with your choice of filling, and enjoy the comforting fall flavors they bring! You can learn more about this topic.

Easy Mummy Hand Pies
Course: Dinner Cuisine: American Difficulty: Easy
🍽️Servings12
⏱️Prep Time1 hr
🍳Cook Time25 min
🔥Calories—Halloween is a time for fun, creativity, and delicious treats, and what better way to celebrate than with Easy Mummy Hand Pies? These delightful pastries not only look impressive but are also simple to make, making them perfect for family gatherings, school parties, or a festive Halloween dinner.
Cook Mode Keep the screen of your device onIngredients
-
2 ½ cups all-purpose flour
-
1 teaspoon salt
-
1 cup unsalted butter, cold and cut into cubes
-
6–8 tablespoons ice water
-
1 cup cooked and shredded chicken (or your choice of protein)
-
½ cup shredded cheese (cheddar, mozzarella, or cheese of your choice)
-
½ cup pumpkin puree (for a festive twist)
-
1 teaspoon garlic powder
-
1 teaspoon onion powder
-
Salt and pepper to taste
-
1 egg, beaten (for egg wash)
-
Black olives (for eyes)
Directions
1.Make the Pastry Dough: In a large mixing bowl, combine the flour and salt thoroughly to ensure an even distribution. Add the cold, cubed butter and mix using a pastry cutter or your fingers until the mixture resembles coarse crumbs, about the size of peas. Gradually add the ice water, one tablespoon at a time, mixing until the dough comes together. Divide the dough in half, flatten into disks, wrap in plastic, and refrigerate for at least 1 hour.
2.Prepare the Filling: In a medium bowl, combine the cooked chicken, shredded cheese, pumpkin puree, garlic powder, onion powder, salt, and pepper. Mix well until all ingredients are thoroughly combined. Set aside the filling while you work on the dough.
3.Preheat the Oven: Preheat your oven to 400°F (200°C). Line a baking sheet with parchment paper.
4.Roll Out the Dough: On a lightly floured surface, roll out one disk of pastry dough to about ⅛ inch thick. Cut out circles using a cookie cutter or a glass, about 4 inches in diameter.
5.Fill the Pies: Place about 2 tablespoons of the filling in the center of each circle. Leave a small border around the edge to ensure a good seal.
6.Create the Mummy Effect: Roll out the second disk of dough in the same way, then cut it into thin strips to create the 'bandages.' Place a few strips over each filled circle, leaving gaps for 'eyes.'
7.Seal and Brush: Press the edges of the pies together gently but firmly to seal. Brush the tops with the beaten egg for a golden finish.
8.Add the Eyes: Cut small circles from the black olives and place them in the gaps between the strips to create eyes.
9.Bake the Hand Pies: Place the hand pies on the prepared baking sheet and bake in the preheated oven for 20–25 minutes or until the crust is golden brown and flaky.
10.Cool and Serve: Once baked, remove from the oven and let cool slightly on a wire rack. Serve warm or at room temperature.
Recipe Reviews
- ★★★★★
Excellent recipe!
Leave a Reply
Your email address will not be published. Required fields are marked *
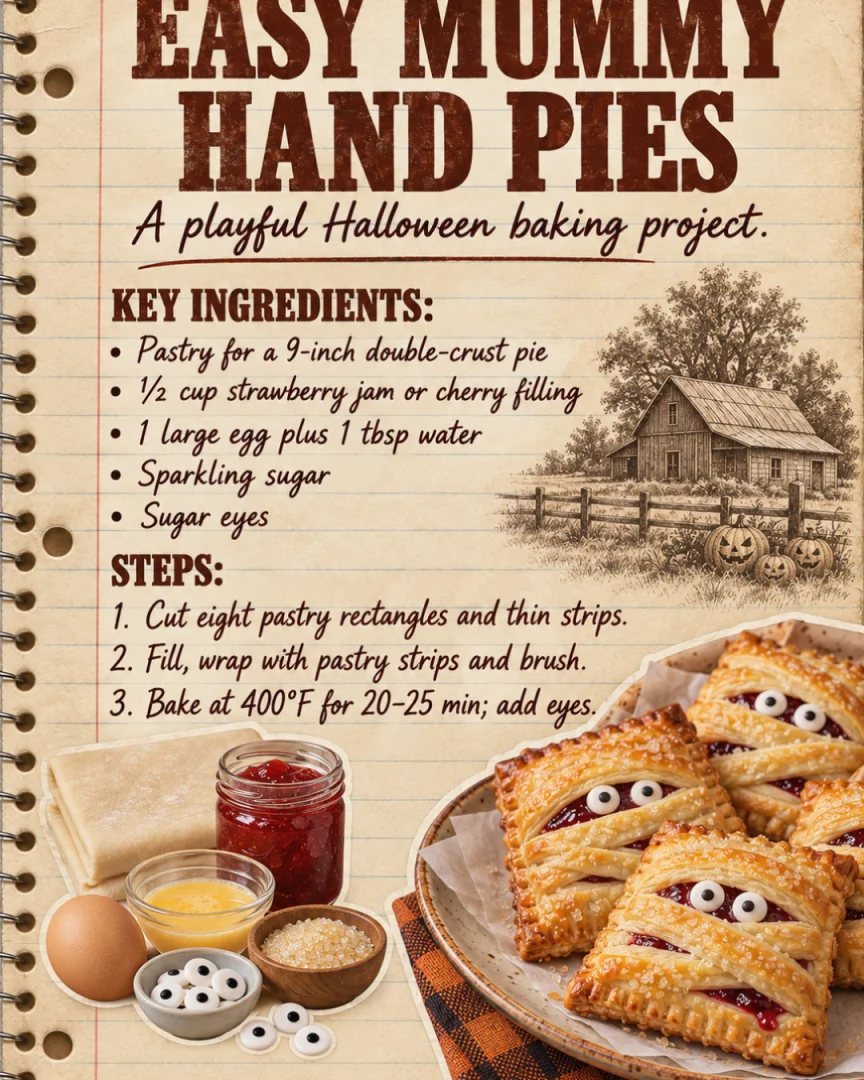
Easy Mummy Hand Pies
Halloween is a time for fun, creativity, and delicious treats, and what better way to celebrate than with Easy Mummy Hand Pies? These delightful pastries not only look impressive but are also simple to make, making them perfect for family gatherings, school parties, or a festive Halloween dinner.
Ingredients
- 2 ½ cups all-purpose flour
- 1 teaspoon salt
- 1 cup unsalted butter, cold and cut into cubes
- 6–8 tablespoons ice water
- 1 cup cooked and shredded chicken (or your choice of protein)
- ½ cup shredded cheese (cheddar, mozzarella, or cheese of your choice)
- ½ cup pumpkin puree (for a festive twist)
- 1 teaspoon garlic powder
- 1 teaspoon onion powder
- Salt and pepper to taste
- 1 egg, beaten (for egg wash)
- Black olives (for eyes)
Directions
Make the Pastry Dough: In a large mixing bowl, combine the flour and salt thoroughly to ensure an even distribution. Add the cold, cubed butter and mix using a pastry cutter or your fingers until the mixture resembles coarse crumbs, about the size of peas. Gradually add the ice water, one tablespoon at a time, mixing until the dough comes together. Divide the dough in half, flatten into disks, wrap in plastic, and refrigerate for at least 1 hour.
Prepare the Filling: In a medium bowl, combine the cooked chicken, shredded cheese, pumpkin puree, garlic powder, onion powder, salt, and pepper. Mix well until all ingredients are thoroughly combined. Set aside the filling while you work on the dough.
Preheat the Oven: Preheat your oven to 400°F (200°C). Line a baking sheet with parchment paper.
Roll Out the Dough: On a lightly floured surface, roll out one disk of pastry dough to about ⅛ inch thick. Cut out circles using a cookie cutter or a glass, about 4 inches in diameter.
Fill the Pies: Place about 2 tablespoons of the filling in the center of each circle. Leave a small border around the edge to ensure a good seal.
Create the Mummy Effect: Roll out the second disk of dough in the same way, then cut it into thin strips to create the 'bandages.' Place a few strips over each filled circle, leaving gaps for 'eyes.'
Seal and Brush: Press the edges of the pies together gently but firmly to seal. Brush the tops with the beaten egg for a golden finish.
Add the Eyes: Cut small circles from the black olives and place them in the gaps between the strips to create eyes.
Bake the Hand Pies: Place the hand pies on the prepared baking sheet and bake in the preheated oven for 20–25 minutes or until the crust is golden brown and flaky.
Cool and Serve: Once baked, remove from the oven and let cool slightly on a wire rack. Serve warm or at room temperature.
Recipe Reviews
- ★★★★★
Excellent recipe!
Leave a Reply
Your email address will not be published. Required fields are marked *



Excellent recipe!