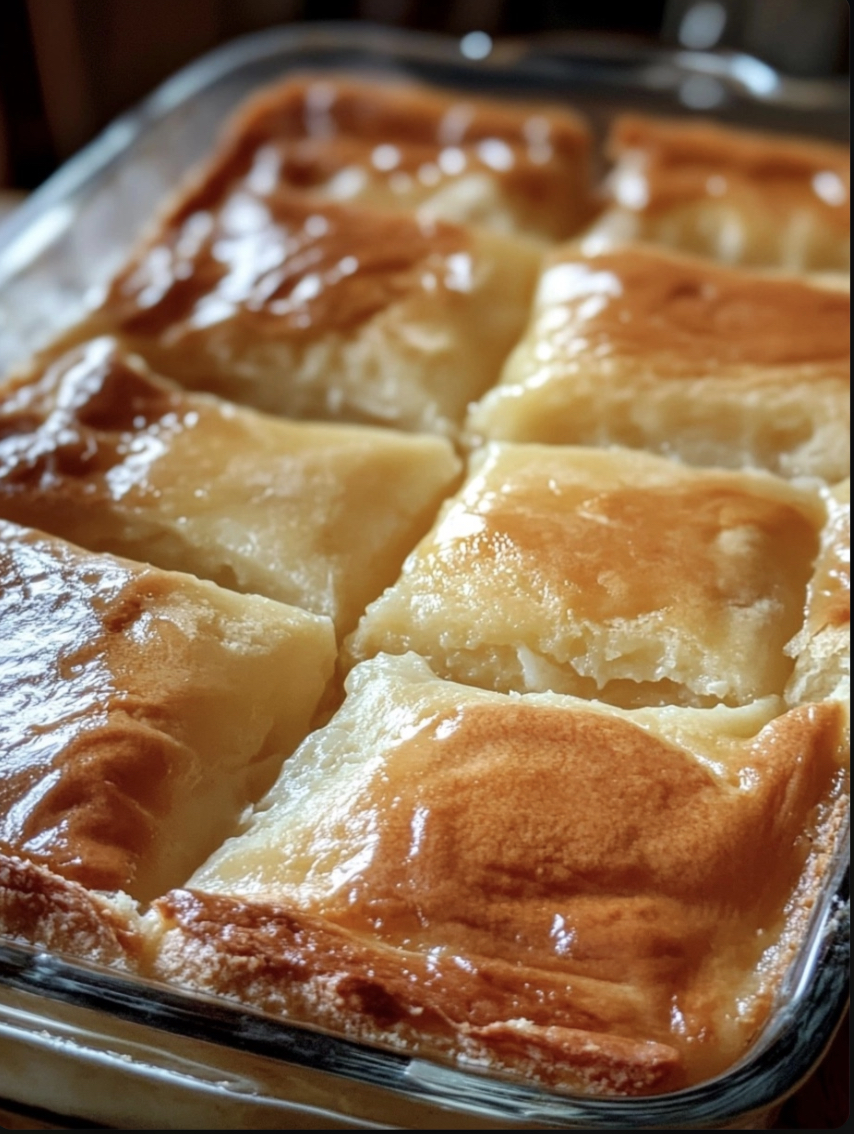
Ooey Gooey Bars are a rich, decadent dessert that combines a buttery cake mix base with a creamy, sweet filling that practically melts in your mouth. These bars are easy to make and perfect for any occasion, from parties to family gatherings, or just as a sweet treat to share. The layers of buttery cake and gooey filling make them simply irresistible!
Table of Contents
- Introduction
- Ingredients
- Instructions
- Cook Notes
- Variations
- Serving Suggestions
- Frequently Asked Questions
- Conclusion
Ingredients
Base Layer
- 1 box (15.25 oz) yellow cake mix
- 1/2 cup unsalted butter, melted
- 1 large egg
Gooey Topping
- 8 oz cream cheese, softened
- 2 large eggs
- 1 teaspoon vanilla extract
- 3 3/4 cups powdered sugar
Instructions
Step 1: Preheat the Oven
Preheat your oven to 350°F (175°C). Grease a 9×13-inch baking dish or line it with parchment paper for easy removal.
Step 2: Make the Base Layer
In a large mixing bowl, combine the cake mix, melted butter, and egg. Stir until well mixed and a dough forms. Press the dough evenly into the bottom of the prepared baking dish to create the base layer.
Step 3: Prepare the Gooey Topping
In another mixing bowl, beat the cream cheese until smooth. Add the eggs, one at a time, followed by the vanilla extract. Gradually add the powdered sugar, mixing until smooth and creamy.
Step 4: Assemble the Bars
Pour the cream cheese mixture over the base layer, spreading it out evenly with a spatula.
Step 5: Bake
Bake in the preheated oven for 35-40 minutes. The edges should be golden brown and set, while the center remains slightly jiggly. The gooey texture is what makes these bars so special!
Step 6: Cool and Slice
Allow the Ooey Gooey Bars to cool completely in the pan before slicing into squares. Cooling will help set the gooey filling, making slicing easier.
Cook Notes
- Cream Cheese: Make sure the cream cheese is softened to room temperature to ensure a smooth and creamy topping.
- Baking Time: Be careful not to overbake; the center should still be slightly soft when you remove it from the oven.
- Mixing: Mix the ingredients for the base until just combined to avoid a tough texture.
Variations
1. Chocolate Ooey Gooey Bars
Replace the yellow cake mix with chocolate cake mix for a rich, chocolatey twist. You can also add 1/2 cup mini chocolate chips to the gooey topping for extra indulgence.
2. Peanut Butter Ooey Gooey Bars
Add 1/2 cup creamy peanut butter to the cream cheese mixture before adding the powdered sugar for a nutty flavor.
3. Lemon Ooey Gooey Bars
Replace the yellow cake mix with lemon cake mix and add 1 tablespoon lemon zest to the gooey topping for a fresh, citrusy version.
Serving Suggestions
- Whipped Cream: Top each bar with a dollop of whipped cream for extra sweetness.
- Ice Cream: Serve with a scoop of vanilla ice cream for a decadent dessert.
- Fresh Berries: Garnish with fresh berries to add a burst of tartness that balances the rich sweetness of the bars.
Frequently Asked Questions
Can I Make Ooey Gooey Bars Ahead of Time?
Yes! These bars can be made up to 2 days in advance. Store them in an airtight container at room temperature or in the refrigerator.
How Do I Store Leftovers?
Store any leftover Ooey Gooey Bars in an airtight container at room temperature for up to 3 days, or in the refrigerator for up to 5 days. You can also freeze them for up to 3 months.
Can I Use a Different Cake Mix?
Absolutely! Feel free to experiment with different flavors like spice, red velvet, or strawberry cake mix to create unique variations.
Ooey Gooey Bars are a decadent and delicious dessert that is perfect for any occasion. With their buttery base and sweet, creamy topping, these bars are a guaranteed crowd-pleaser. Whether you’re baking them for a special event or just to satisfy your sweet tooth, this recipe is sure to become a favorite. Give it a try and indulge in the ooey, gooey goodness!
Did you make this recipe? Share your experience in the comments below and let us know how it turned out!


Denn die Kleiderordnung wurde gerade in der jüngeren Vergangenheit
angepasst und die Zügel gelockert, wofür es einige kritischen Bewertungen gab.
Untergebracht in einem historisch-rustikalen Backsteinhaus aus dem Jahre 1906 können Gambler seit 2010 in der
Spielbank die volle Bandbreite an klassischen und modernen Glücksspielen erleben. Aber selbst
wer ohne zu spielen einfach nur das besondere und traditionelle Casino-Flair in Bad
Ems erleben will, ist herzlichst eingeladen und willkommen. Dafür
trägt auch der Automatenbereich Sorge, der vom
Klassischen Spiel abgetrennt ist und knapp 70 Glücksspielautomaten umfasst.
Das spiegelt sich im überschaubaren Angebot an Casinospielen wider.
Die Mitarbeiter freuen sich immer über Glücksspielfans.
Das Glücksspielunternehmen ist das ganze Jahr über geöffnet.
Touristen können das Glücksspiel auch mit dem Taxi, Bus oder Transfer erreichen. Zum Beispiel hat
jeder die Chance, über 1 Million € in Mega Million Jackpot- oder Mystery Ticket-Slots mit
einem Preispool von 7.750 € zu gewinnen (Verlosung jeden Monat).
Das Casino bietet eine Vielzahl von Video-Slots, darunter klassische und progressive.
Der Genuss & Casino-Gutschein im Wert von 39 €
bietet 2 Gerichte, 10 € Chips, ein Glas Wein und 1 Roulette-Chip mit der
Chance, 1.000 € zu gewinnen.
References:
https://online-spielhallen.de/alles-uber-den-sugar-casino-bonus-code-und-mehr/
We’ve built a world of trusted features and generous rewards just for you.
Access is offered only in jurisdictions where online gaming is lawful
and under the applicable licenses of the operating entity.
Withdrawal processing follows responsible policies, including verification status
and any applicable wagering completion.
King Billy Casino maintains comprehensive support infrastructure addressing player inquiries through multiple communication channels.
The transparent tier progression system clearly displays requirements and benefits, allowing players
to track advancement toward their next level. Each tier unlocks enhanced perks including
faster withdrawals, higher betting limits, and personalized account management.
References:
https://blackcoin.co/vip-slots-best-slots-for-real-money-play-with-bonuses-2023/
It can be used to emphasize the essential nature of something or someone.
So, don’t be afraid to explore the thesaurus –
your writing will thank you for it! Synonyms are powerful tools that can add richness and precision to your writing.
High-priority
Some words are close to important but not exactly the same.
These fit turning points and major happenings.
These fit life, survival, and wellbeing.
References:
https://blackcoin.co/overview-of-gw-casino/
paypal casinos online that accept
References:
careers.universalair.aero
**mitolyn reviews**
Mitolyn is a carefully developed, plant-based formula created to help support metabolic efficiency and encourage healthy, lasting weight management.