Introduction
Imagine the satisfying crunch of a perfectly fried snack paired with the tangy flavor of pickles—enter the irresistible world of Fried Pickles. This beloved dish has captured the hearts and taste buds of many, offering a unique culinary experience that combines the best of both worlds: crispy coatings and tangy pickles. In this article, we’ll delve into the art of making Fried Pickles, exploring the origins of this popular snack and sharing a mouthwatering recipe that will leave you craving for more.
Whether you’re a fan of deep-fried delights or simply looking to add a new appetizer to your repertoire, Fried Pickles are sure to become a favorite in your household. The perfect blend of textures and flavors makes this dish a crowd-pleaser at gatherings, parties, or even just a cozy night in. Let’s embark on a culinary journey that celebrates the joy of indulging in crispy, savory treats.
So, grab your apron and get ready to fry up a storm as we uncover the secrets behind creating the ultimate Fried Pickles that will have your friends and family coming back for more.
Now, let’s dive into why this recipe for Fried Pickles is not just any ordinary snack—it’s a delightful fusion of flavors and textures that will elevate your snacking game to a whole new level.
Why You’ll Love This Recipe
One bite of these Fried Pickles, and you’ll be hooked! The crispy exterior gives ways to a juicy pickle center, creating a delightful contrast that keeps you reaching for more. What makes this recipe truly special is its simplicity—requiring just a few basic ingredients and minimal prep time. Whether you’re a novice in the kitchen or a seasoned pro, these Fried Pickles are guaranteed to impress.
Not only are these Fried Pickles a delicious treat, but they also offer a guilt-free indulgence. By using wholesome ingredients and controlling the frying process, you can enjoy a homemade snack that is far healthier than store-bought alternatives. Say goodbye to greasy, mass-produced snacks and hello to a fresh, flavorful alternative that you can feel good about.
With the flexibility to customize the seasonings and coatings to your liking, these Fried Pickles cater to a wide range of taste preferences. Whether you prefer a classic garlic and herb blend or a spicy kick with cayenne pepper, the possibilities are endless. Get ready to elevate your snacking experience with this versatile and delectable recipe.
So, if you’re looking for a quick, easy-to-make snack that packs a punch in flavor and texture, these Fried Pickles are a must-try. From game day gatherings to cozy nights in, this recipe will soon become a staple in your culinary repertoire.
Ingredients
To recreate this flavorful snack at home, you’ll need the following ingredients:
– Dill pickles (sliced) – All-purpose flour – Cornmeal – Eggs – Milk – Salt – Pepper – Paprika – Garlic powder – Vegetable oil for frying
Optional Ingredient Substitutions:
– For a gluten-free version, you can use cornstarch or a gluten-free flour blend. – If you prefer a spicier kick, consider adding cayenne pepper or chili powder to the coating mixture. – Experiment with different pickle varieties like bread and butter pickles for a unique twist.
Step-by-Step Instructions
1. In a shallow bowl, combine flour, cornmeal, salt, pepper, paprika, and garlic powder. 2. In another bowl, whisk together eggs and milk to create the egg wash. 3. Dip pickle slices into the flour mixture, then the egg wash, and coat again with the flour mixture. 4. Heat vegetable oil in a deep skillet or fryer until it reaches 350°F. 5. Fry the coated pickle slices in batches until golden brown and crispy, about 2-3 minutes per side. 6. Remove the fried pickles and drain them on a paper towel-lined plate. 7. Serve hot with your favorite dipping sauce and enjoy!
Pro Tip: For extra crispy Fried Pickles, double coat the pickles by repeating the dipping process before frying.
These simple steps will guide you through creating the perfect Fried Pickles that are crunchy on the outside and juicy on the inside. With a few easy-to-follow instructions, you’ll be savoring this delectable snack in no time.
Expert Tips for Success
– Ensure the oil is at the correct temperature before frying to achieve a crispy texture. – Do not overcrowd the skillet or fryer when frying the pickles to allow for even cooking. – Use paper towels to blot excess oil from the fried pickles before serving to keep them light and crispy. – Experiment with different seasoning blends to customize the flavor profile of your Fried Pickles.
By following these expert tips, you’ll master the art of making Fried Pickles like a pro. Impress your guests with perfectly fried and seasoned pickles that are bursting with flavor and crunch.
Variations and Substitutions
Looking to switch up the traditional Fried Pickles recipe? Here are some creative variations and substitutions to try:
– Substitute pickled jalapeños for an extra kick of heat. – Add grated Parmesan cheese to the coating mixture for a cheesy twist. – Use pickle spears instead of slices for a different presentation. – Drizzle honey or maple syrup over the fried pickles for a sweet and savory combination.
Feel free to get creative in the kitchen and experiment with different ingredients to put a unique spin on this classic snack. The possibilities are endless when it comes to customizing your Fried Pickles to suit your taste preferences.
Serving Suggestions
To elevate your Fried Pickles experience, consider serving them with:
– Creamy ranch dressing for dipping – Spicy sriracha mayo for a kick of flavor – Ice-cold beer or a refreshing lemonade to complement the savory flavors
Whether you’re hosting a party or simply enjoying a night in, these serving suggestions will enhance the enjoyment of your Fried Pickles and create a memorable snacking experience.
FAQs
Q: Can I make Fried Pickles ahead of time and reheat them?
A: While Fried Pickles are best enjoyed fresh and hot, you can reheat them in the oven at 350°F for a few minutes to crisp them up.
Q: Can I use pickle chips instead of pickle slices?
A: Yes, you can use pickle chips for bite-sized Fried Pickles that are perfect for snacking.
Q: How do I store leftover Fried Pickles?
A: Store any leftover Fried Pickles in an airtight container in the refrigerator. To reheat, place them in the oven until warm and crispy.
By addressing these common questions, you’ll be equipped with the knowledge to troubleshoot any concerns that may arise while preparing or serving Fried Pickles.
Final Thoughts
As we wrap up our culinary exploration of Fried Pickles, we hope you’re inspired to embark on your own flavorful journey in the kitchen. This simple yet satisfying snack has the power to bring joy and delight to any occasion, from casual gatherings to cozy nights at home.
So, gather your ingredients, heat up the oil, and get ready to experience the crispy, tangy goodness of homemade Fried Pickles. Whether you’re a fan of traditional recipes or enjoy putting a unique twist on classic dishes, this recipe is sure to become a favorite in your repertoire.
Don’t be afraid to get creative and experiment with different seasonings, coatings, and serving styles to make this recipe your own. The joy of cooking lies in the freedom to tailor dishes to your preferences and create memorable experiences through food.
We invite you to savor every crispy bite, share this delightful snack with your loved ones, and create lasting memories around the simple pleasure of enjoying good food together. Cheers to the delicious journey ahead with Fried Pickles!
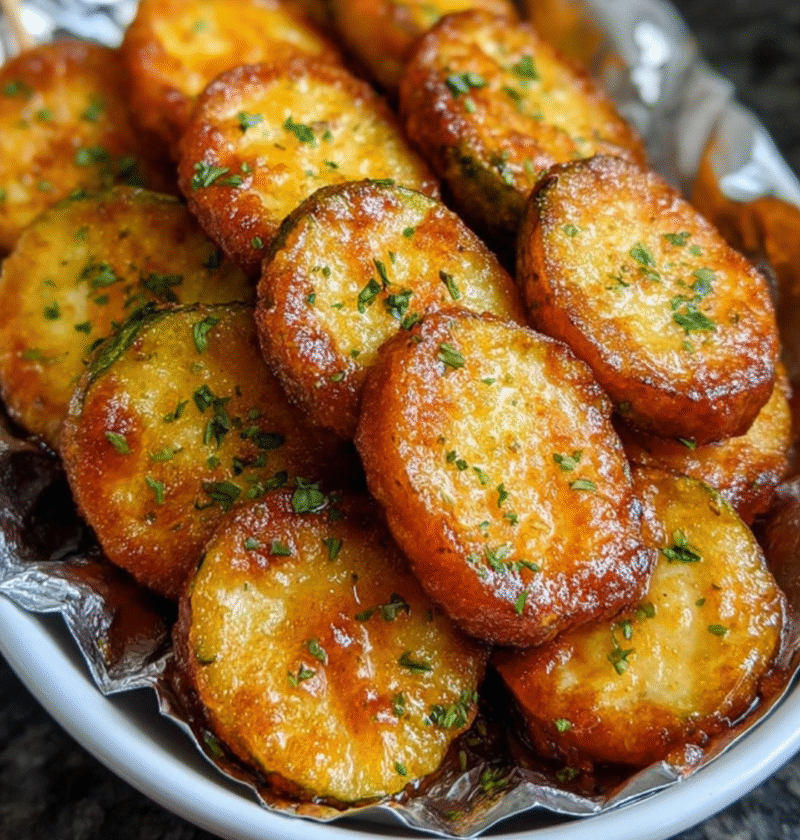
Fried Pickles
Experience the satisfying crunch of perfectly fried pickles with a tangy twist. These Fried Pickles offer a delightful contrast of crispy coatings and juicy centers, making them a popular snack for gatherings or cozy nights in.
Ingredients
- Dill pickles (sliced)
- 1 cup all-purpose flour
- 1 cup cornmeal
- 2 eggs
- 1/2 cup milk
- 1 teaspoon salt
- 1/2 teaspoon pepper
- 1 teaspoon paprika
- 1 teaspoon garlic powder
- Vegetable oil for frying
Directions
- In a shallow bowl, combine flour, cornmeal, salt, pepper, paprika, and garlic powder.
- In another bowl, whisk together eggs and milk to create the egg wash.
- Dip pickle slices into the flour mixture, then the egg wash, and coat again with the flour mixture.
- Heat vegetable oil in a deep skillet or fryer until it reaches 350°F.
- Fry the coated pickle slices in batches until golden brown and crispy, about 2-3 minutes per side.
- Remove the fried pickles and drain them on a paper towel-lined plate.
- Serve hot with your favorite dipping sauce and enjoy!
Nutrition Facts