Table of Contents
- Introduction
- Ingredients
- Instructions
- Cooking Notes
- Variations
- Frequently Asked Questions (FAQs)
- Conclusion
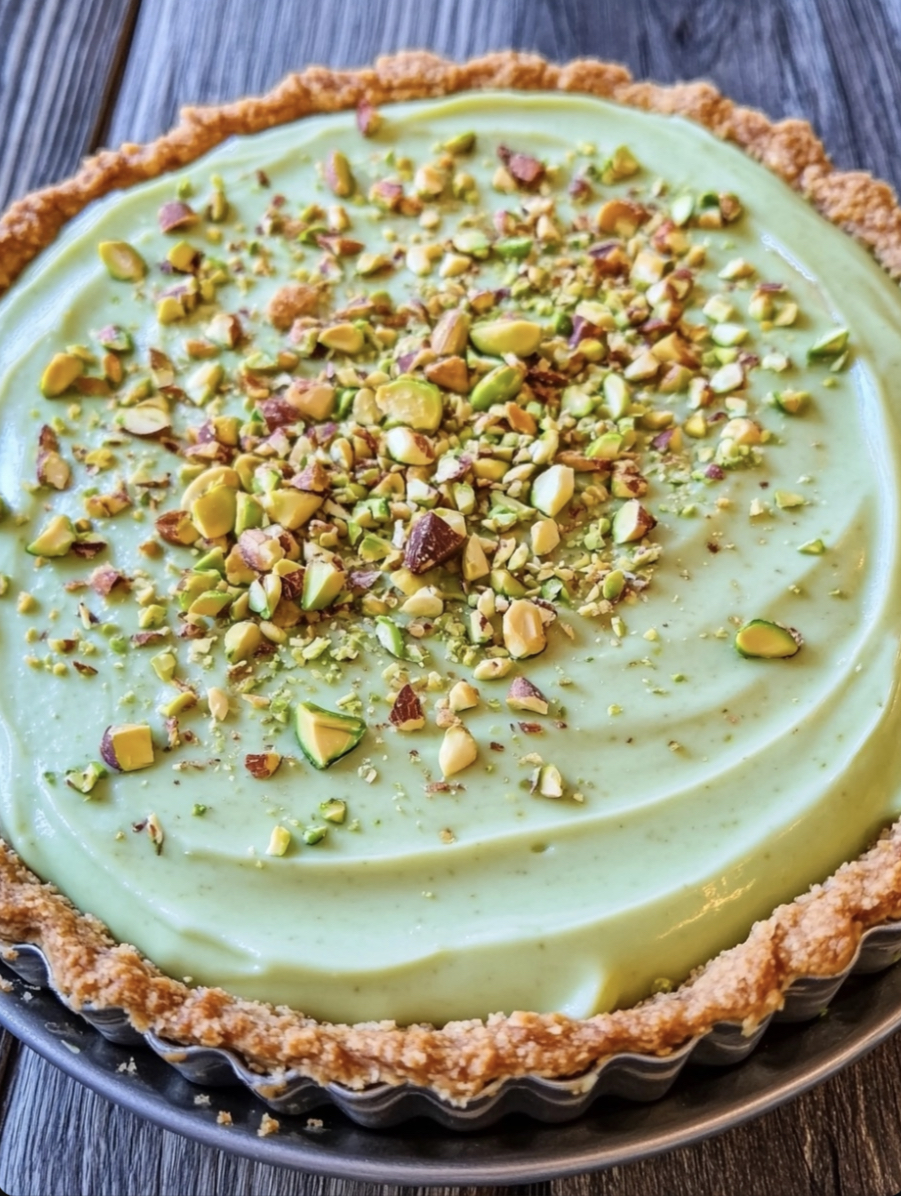
Pistachio Cream Pie is a creamy, dreamy dessert that’s perfect for when you want a sweet treat without much fuss. With its pistachio pudding filling, fluffy whipped topping, and a buttery graham cracker crust, this pie is both light and indulgent. It’s a wonderful no-bake option for holidays, potlucks, or any occasion that calls for an easy, yet impressive dessert.
Ingredients
For the Crust:
- 1 1/2 cups graham cracker crumbs
- 1/4 cup granulated sugar
- 6 tablespoons unsalted butter, melted
For the Filling:
- 1 package (3.4 oz) instant pistachio pudding mix
- 1 1/2 cups cold whole milk
- 1/2 cup heavy cream
- 1 package (8 oz) Cool Whip (or 3 cups homemade whipped cream)
- 1/4 cup chopped pistachios (for garnish, optional)
Instructions
1. Make the Crust
- Combine Ingredients: In a medium mixing bowl, combine the graham cracker crumbs, granulated sugar, and melted butter. Stir until the mixture resembles wet sand.
- Press the Crust: Press the mixture evenly into the bottom and up the sides of a 9-inch pie dish. Use the back of a measuring cup to press firmly for an even crust.
- Chill: Place the crust in the refrigerator to set while preparing the filling (about 20-30 minutes).
2. Make the Pistachio Filling
- In a large mixing bowl, whisk together the instant pistachio pudding mix, cold milk, and heavy cream for about 2 minutes, or until the mixture starts to thicken.
- Gently fold in the Cool Whip until the filling is smooth and well combined.
3. Assemble the Pie
- Pour the pistachio filling into the chilled graham cracker crust, spreading it out evenly with a spatula.
- Smooth the top of the pie and refrigerate for at least 4 hours, or until set. For best results, chill overnight.
4. Garnish and Serve
- Before serving, sprinkle chopped pistachios on top of the pie for garnish (if desired).
- Slice and serve chilled. Enjoy!
Cooking Notes
- Crust: Make sure to press the crust firmly into the pie dish to ensure it holds together when sliced. Chilling the crust helps it firm up before adding the filling.
- Chill Time: It’s important to let the pie chill for at least 4 hours to allow the pudding filling to fully set. Overnight is even better for the best texture.
Variations
- Chocolate Pistachio Pie: Add a layer of melted chocolate on the bottom of the crust before adding the pistachio filling for a chocolate-pistachio twist.
- Oreo Crust: Substitute the graham cracker crust with an Oreo crust for extra indulgence.
- Coconut Pistachio Cream Pie: Fold in 1/2 cup of shredded coconut into the filling for a tropical flair.
Frequently Asked Questions (FAQs)
Can I make this pie ahead of time?
Yes, this pie is perfect for making ahead. It needs to be refrigerated for at least 4 hours to set, but you can make it up to 2 days in advance. Store it in the refrigerator until ready to serve.
How do I store leftover pie?
Store leftover pie in the refrigerator, covered with plastic wrap or in an airtight container, for up to 4 days.
Can I freeze Pistachio Cream Pie?
Yes, you can freeze this pie. Cover it tightly with plastic wrap and aluminum foil, and freeze for up to 2 months. To serve, thaw in the refrigerator overnight.
Can I use homemade whipped cream instead of Cool Whip?
Yes, you can use homemade whipped cream. Whip 1 1/2 cups of heavy cream with 2-3 tablespoons of powdered sugar until stiff peaks form, then fold it into the pistachio mixture.
What can I serve with Pistachio Cream Pie?
This pie is delicious on its own, but you can also serve it with fresh berries, an extra dollop of whipped cream, or even a drizzle of chocolate syrup for added sweetness.
Pistachio Cream Pie is an easy, no-bake dessert that’s creamy, nutty, and perfect for any occasion. The combination of a buttery graham cracker crust, smooth pistachio filling, and light whipped topping makes this dessert a winner every time.
Give this recipe a try and enjoy a delightful, easy-to-make pie that’s sure to impress your family and friends!
Let me know if you need more variations or additional tips for this recipe




Thanks for sharing. I read many of your blog posts, cool, your blog is very good.
Can you be more specific about the content of your article? After reading it, I still have some doubts. Hope you can help me. https://accounts.binance.com/zh-TC/register-person?ref=VDVEQ78S
Your point of view caught my eye and was very interesting. Thanks. I have a question for you.
**mitolyn official**
Mitolyn is a carefully developed, plant-based formula created to help support metabolic efficiency and encourage healthy, lasting weight management.
Thanks for sharing. I read many of your blog posts, cool, your blog is very good.