Wisconsin Apple Kringle Recipe
Introduction
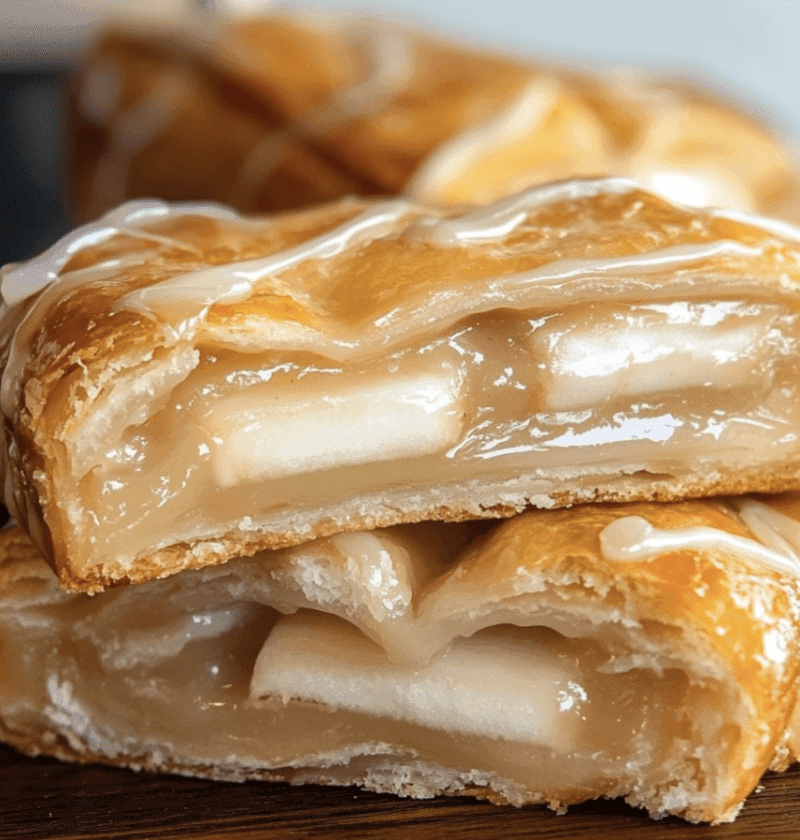
Welcome to this delicious Wisconsin Apple Kringle recipe! If you’re a fan of sweet pastries, you’re in for a treat. This traditional Danish pastry has been popular in Wisconsin for generations. It’s flaky, buttery, and filled with a delightful apple filling. Whether you’re a seasoned baker or a beginner, this recipe will guide you through the steps to create a perfect Wisconsin Apple Kringle in your own kitchen.
Ingredients
For the pastry:
– 2 ½ cups all-purpose flour
– 1 cup cold unsalted butter, cut into small pieces
– ¼ teaspoon salt
– 1 cup sour cream
– 1 egg yolk
– 1 teaspoon vanilla extract
For the apple filling:
– 4 cups peeled and thinly sliced apples
– ½ cup granulated sugar
– 2 tablespoons all-purpose flour
– 1 teaspoon ground cinnamon
– ½ teaspoon lemon juice
Steps
Step 1: In a large bowl, combine the flour, butter, and salt. Use a pastry blender or your fingers to cut the butter into the flour until the mixture resembles coarse crumbs.
Step 2: In a separate bowl, mix together the sour cream, egg yolk, and vanilla extract. Gradually add this mixture to the flour mixture, stirring until a soft dough forms.
Step 3: Divide the dough into two equal portions. Wrap each portion in plastic wrap and refrigerate for at least 1 hour.
Step 4: Preheat your oven to 375°F (190°C). Line a baking sheet with parchment paper.
Step 5: In a mixing bowl, combine the sliced apples, sugar, flour, cinnamon, and lemon juice. Toss until the apples are well coated.
Step 6: On a lightly floured surface, roll out one portion of the dough into a 10×14-inch rectangle. Transfer the dough to the prepared baking sheet.
Step 7: Spread half of the apple filling down the center of the dough, leaving a border of dough on each side.
Step 8: Cut slits in the dough on both sides of the filling, about 1 inch apart. Fold the strips of dough over the filling in a crisscross pattern.
Step 9: Repeat steps 6-8 with the remaining dough and apple filling.
Step 10: Bake the kringle in the preheated oven for 25-30 minutes, or until the pastry is golden brown.
Step 11: Allow the kringle to cool on the baking sheet for 10 minutes before transferring to a wire rack to cool completely.
Keto and Low Carbs Variations
If you’re following a keto or low carb diet, you can still enjoy a delicious Wisconsin Apple Kringle with a few modifications. Instead of using all-purpose flour, you can use almond flour or coconut flour for the pastry. For the apple filling, replace the granulated sugar with a keto-friendly sweetener like erythritol or stevia. It’s important to note that the texture and taste may vary slightly, but it will still be a tasty treat for those watching their carb intake.
Tips
– Make sure the butter for the pastry is cold. This will help create a flaky texture.
– Don’t overmix the dough. Mix until just combined to avoid a tough pastry.
– Feel free to add chopped nuts or raisins to the apple filling for extra flavor and texture.
– Serve the Wisconsin Apple Kringle warm with a dusting of powdered sugar or a scoop of vanilla ice cream.
Conclusion
Now that you have the recipe for a mouthwatering Wisconsin Apple Kringle, it’s time to put your baking skills to the test. This pastry is a delightful treat that can be enjoyed any time of the year. Whether you’re serving it for breakfast, dessert, or as a special treat with a cup of coffee, it’s sure to impress your family and friends. So grab your apron and get ready to create a delicious masterpiece in your own kitchen.
FAQs
Q: Can I freeze the Wisconsin Apple Kringle?
A: Yes, you can freeze the kringle for up to 3 months. Wrap it tightly in plastic wrap and place it in an airtight container before freezing. Thaw it overnight in the refrigerator before serving.
Q: Can I use a different fruit for the filling?
A: Absolutely! While apple is traditional, you can experiment with different fruits like cherry, blueberry, or peach to create your own unique kringle.
Q: How long does the Wisconsin Apple Kringle stay fresh?
A: The kringle can be stored at room temperature in an airtight container for up to 3 days. After that, it’s best to refrigerate it to maintain its freshness.
