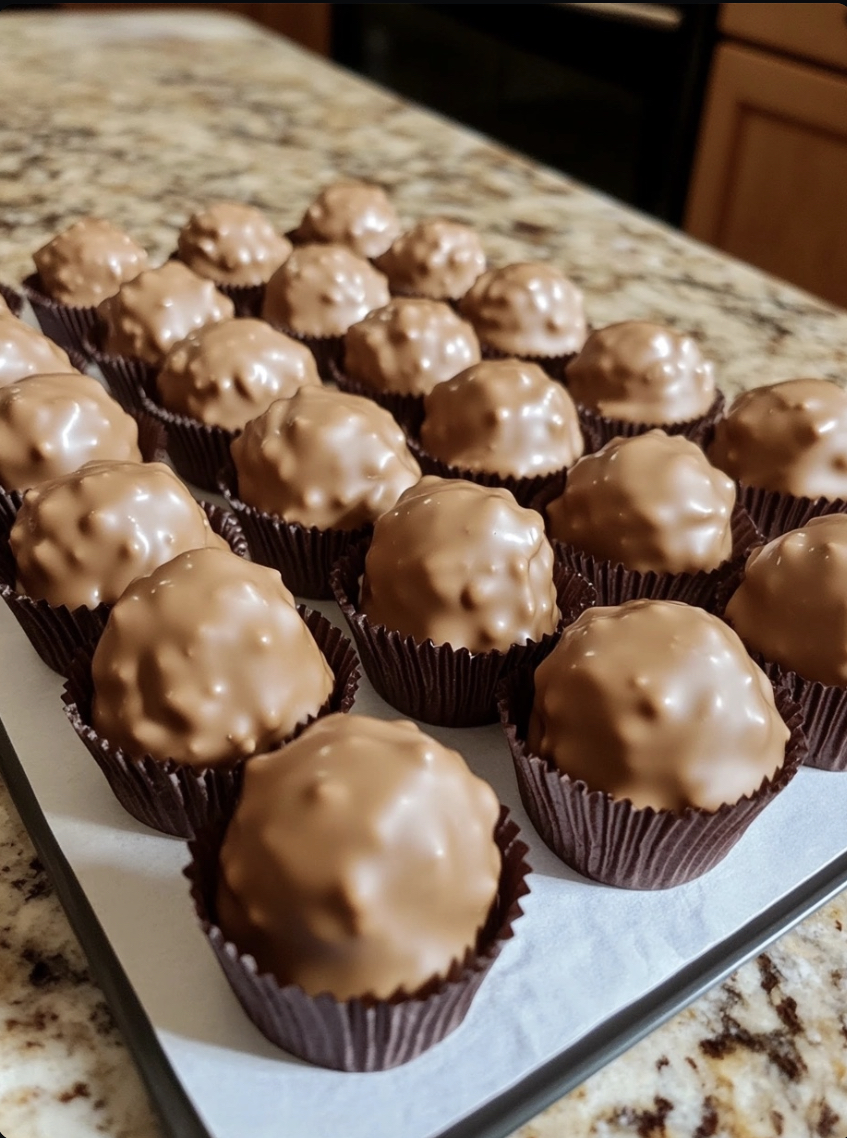
Butterfinger Balls are a delightful, no-bake treat featuring crushed Butterfinger candy bars combined with creamy peanut butter and coated in rich chocolate. They’re easy to make and perfect for parties, holidays, or anytime you want a sweet, crunchy indulgence. These bite-sized treats are sure to satisfy your candy cravings!
Table of Contents
- Introduction
- Ingredients
- Instructions
- Cook Notes
- Variations
- Serving Suggestions
- Frequently Asked Questions
- Conclusion
Ingredients
Main Ingredients
- 2 cups crushed Butterfinger candy bars
- 1 cup creamy peanut butter
- 1/4 cup unsalted butter, softened
- 1 1/2 cups powdered sugar
- 2 cups semi-sweet chocolate chips
- 1 tablespoon coconut oil or vegetable shortening (optional, for smoother coating)
Instructions
Step 1: Prepare the Filling
In a large mixing bowl, combine the crushed Butterfinger candy bars, creamy peanut butter, softened butter, and powdered sugar. Mix until well combined and a dough forms. If the mixture is too sticky, add a bit more powdered sugar until it reaches a workable consistency.
Step 2: Form the Balls
Using your hands or a small cookie scoop, shape the mixture into 1-inch balls. Place the balls on a baking sheet lined with parchment paper. Once all the balls are formed, refrigerate them for 30 minutes to firm up.
Step 3: Melt the Chocolate
In a microwave-safe bowl, combine the semi-sweet chocolate chips and coconut oil (if using). Microwave in 30-second increments, stirring between each, until the chocolate is fully melted and smooth.
Step 4: Coat the Butterfinger Balls
Using a fork or dipping tool, dip each ball into the melted chocolate, allowing any excess chocolate to drip off. Place the coated balls back onto the parchment-lined baking sheet.
Step 5: Set the Coating
Refrigerate the Butterfinger Balls for 30 minutes or until the chocolate coating is set. Once set, they are ready to enjoy!
Cook Notes
- Butterfinger Candy Bars: For easy crushing, place the candy bars in a zip-top bag and crush them with a rolling pin or heavy skillet.
- Chocolate Coating: Adding coconut oil or vegetable shortening helps make the chocolate smoother and easier to work with, but it’s optional.
- Storage: Store the Butterfinger Balls in an airtight container in the refrigerator for up to 1 week.
Variations
1. Dark Chocolate Butterfinger Balls
Use dark chocolate chips instead of semi-sweet for a richer flavor that contrasts beautifully with the sweet peanut butter filling.
2. White Chocolate Butterfinger Balls
Try coating the balls in white chocolate for a sweeter variation with a creamy flavor.
3. Coconut Butterfinger Balls
Roll the finished Butterfinger Balls in shredded coconut before the chocolate sets for an extra layer of texture and flavor.
Serving Suggestions
- Holiday Treat: Add festive sprinkles to the chocolate coating before it sets to make these perfect for holidays like Christmas or Halloween.
- Gift Idea: Package these treats in a cute tin or gift box for a thoughtful homemade gift for friends and family.
- Party Tray: Arrange the Butterfinger Balls on a dessert tray alongside other bite-sized treats for a party or gathering.
Frequently Asked Questions
Can I Use Chunky Peanut Butter?
Yes, you can use chunky peanut butter if you prefer a bit more texture in the filling. It will add some extra crunch.
How Do I Store Butterfinger Balls?
Store the Butterfinger Balls in an airtight container in the refrigerator for up to 1 week. You can also freeze them for longer storage, up to 3 months.
Can I Make These Without Peanut Butter?
If you have a peanut allergy, try using almond butter or sunflower seed butter as a substitute. The flavor will be slightly different, but still delicious.
Butterfinger Balls are a fun, easy-to-make treat that combines the crunch of Butterfinger candy bars with creamy peanut butter and rich chocolate. Whether you’re making them for a special occasion or just to satisfy a sweet craving, these bite-sized delights are sure to be a hit. Give them a try and enjoy the perfect combination of flavors and textures!
Did you make this recipe? Share your experience in the comments below and let us know how it turned out!

pin up roʻyxatdan oʻtish email orqali pin up roʻyxatdan oʻtish email orqali
1вин чӣ гуна боргирӣ кардан https://1win59278.help
https://solgor.ezpp.ru/
beste wett seite
Also visit my blog post – bet365 Basketball wetten (Basketball-wetten.com)
https://citycatauto.com/what-is-promo-code-in-1xbet-1xbig2026-bonus-e130/
tech kit outlet – Easy to navigate with informative content at every step.
doggearshop boutique – Everything fits snugly and performs well during long adventures.
adlify.click – Loved the layout today; clean, simple, and genuinely user-friendly overall.
Share your travel plan with someone on long trips. Trip safety at Personal injury attorney .
funnely.click – Appreciate the typography choices; comfortable spacing improved my reading experience.
https://balakovo.ezpp.ru/
https://to-portal.com/forums/thread/9523/
digital tech pack shop – Clear guidance and an intuitive interface make browsing effortless.
couriercorner.shop – Enjoyable variety of items and easy, smooth navigation throughout.
doggearshop finds – The harness fits just right and feels very durable outdoors.
How long sewer lines last here depends on clay vs cast iron and soil conditions—often 50–75 years with proper care. plumber breaks down lifespan by material and maintenance tips. Click here
Современные Беспроводные рулонные шторы Прокарниз не только облегчают контроль освещенности в помещении, но и добавляют комфорта в ваш интерьер.
Модели отличаются по габаритам, стилю, типу ткани и способам управления.
trafficy.click – Bookmarked this immediately, planning to revisit for updates and inspiration.
sportwetten versteuern österreich (Irma) lizenz
Helpful suggestions! For more, visit residential assisted living .
trafficy.click – Bookmarked this immediately, planning to revisit for updates and inspiration.
CourierCorner Collection – Enjoyable selection and smooth browsing throughout the site.
admark.click – Mobile version looks perfect; no glitches, fast scrolling, crisp text.
pin up promo kod kiritish joyi pinup91324.help
This was a fantastic read. Check out nursing homes for more.
https://lytkarino.ezpp.ru/
mines o‘yin pinup pinup63481.help
Appreciate the thorough insights. For more, visit assisted living .
growthly.click – Appreciate the typography choices; comfortable spacing improved my reading experience.
https://www.diigo.com/item/note/apb2h/0xho?k=6fcdb9394d273d4ca703814b86da5cb8
Well done! Discover more at servicio postventa cocinas Granada .
норм. Все кладки нахожу без проблем… взял белого и…охуел!!! https://shkaf-kupit.ru Товар нормальный. В этот понедельник оплатил ещё, жду)chemical-mix.com работает у кого ??? всё походу накрылся магаз :::???
Want softer water in Feasterville? Compare water softeners and installation by a Plumber Feasterville on local plumber feasterville .
The first check looks tempting when bills pile up. truck accident lawyer helped me arrange medical liens and wait.
pin up ios yuklab olish http://pinup63481.help/
optimizr.click – Content reads clearly, helpful examples made concepts easy to grasp.
pin up android o‘rnatish http://pinup63481.help/
https://sergiev.ezpp.ru/
traffio.click – Color palette felt calming, nothing distracting, just focused, thoughtful design.