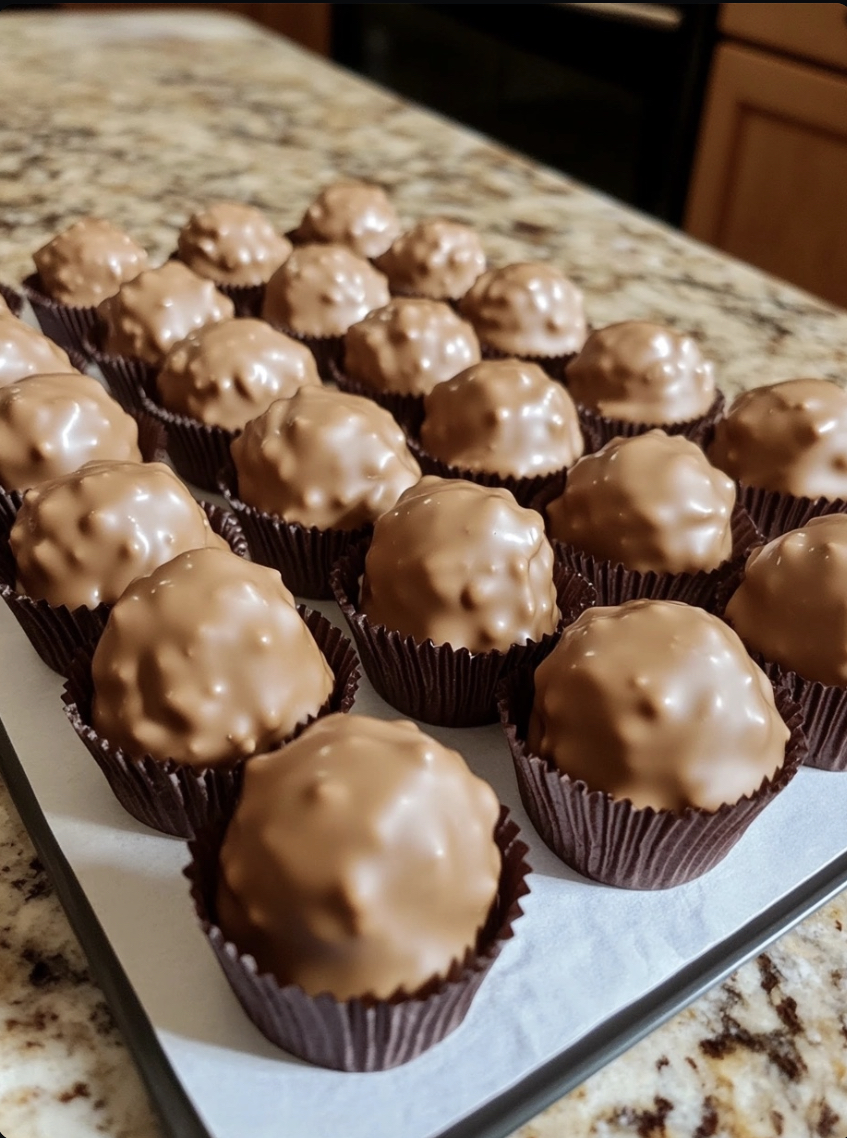
Butterfinger Balls are a delightful, no-bake treat featuring crushed Butterfinger candy bars combined with creamy peanut butter and coated in rich chocolate. They’re easy to make and perfect for parties, holidays, or anytime you want a sweet, crunchy indulgence. These bite-sized treats are sure to satisfy your candy cravings!
Table of Contents
- Introduction
- Ingredients
- Instructions
- Cook Notes
- Variations
- Serving Suggestions
- Frequently Asked Questions
- Conclusion
Ingredients
Main Ingredients
- 2 cups crushed Butterfinger candy bars
- 1 cup creamy peanut butter
- 1/4 cup unsalted butter, softened
- 1 1/2 cups powdered sugar
- 2 cups semi-sweet chocolate chips
- 1 tablespoon coconut oil or vegetable shortening (optional, for smoother coating)
Instructions
Step 1: Prepare the Filling
In a large mixing bowl, combine the crushed Butterfinger candy bars, creamy peanut butter, softened butter, and powdered sugar. Mix until well combined and a dough forms. If the mixture is too sticky, add a bit more powdered sugar until it reaches a workable consistency.
Step 2: Form the Balls
Using your hands or a small cookie scoop, shape the mixture into 1-inch balls. Place the balls on a baking sheet lined with parchment paper. Once all the balls are formed, refrigerate them for 30 minutes to firm up.
Step 3: Melt the Chocolate
In a microwave-safe bowl, combine the semi-sweet chocolate chips and coconut oil (if using). Microwave in 30-second increments, stirring between each, until the chocolate is fully melted and smooth.
Step 4: Coat the Butterfinger Balls
Using a fork or dipping tool, dip each ball into the melted chocolate, allowing any excess chocolate to drip off. Place the coated balls back onto the parchment-lined baking sheet.
Step 5: Set the Coating
Refrigerate the Butterfinger Balls for 30 minutes or until the chocolate coating is set. Once set, they are ready to enjoy!
Cook Notes
- Butterfinger Candy Bars: For easy crushing, place the candy bars in a zip-top bag and crush them with a rolling pin or heavy skillet.
- Chocolate Coating: Adding coconut oil or vegetable shortening helps make the chocolate smoother and easier to work with, but it’s optional.
- Storage: Store the Butterfinger Balls in an airtight container in the refrigerator for up to 1 week.
Variations
1. Dark Chocolate Butterfinger Balls
Use dark chocolate chips instead of semi-sweet for a richer flavor that contrasts beautifully with the sweet peanut butter filling.
2. White Chocolate Butterfinger Balls
Try coating the balls in white chocolate for a sweeter variation with a creamy flavor.
3. Coconut Butterfinger Balls
Roll the finished Butterfinger Balls in shredded coconut before the chocolate sets for an extra layer of texture and flavor.
Serving Suggestions
- Holiday Treat: Add festive sprinkles to the chocolate coating before it sets to make these perfect for holidays like Christmas or Halloween.
- Gift Idea: Package these treats in a cute tin or gift box for a thoughtful homemade gift for friends and family.
- Party Tray: Arrange the Butterfinger Balls on a dessert tray alongside other bite-sized treats for a party or gathering.
Frequently Asked Questions
Can I Use Chunky Peanut Butter?
Yes, you can use chunky peanut butter if you prefer a bit more texture in the filling. It will add some extra crunch.
How Do I Store Butterfinger Balls?
Store the Butterfinger Balls in an airtight container in the refrigerator for up to 1 week. You can also freeze them for longer storage, up to 3 months.
Can I Make These Without Peanut Butter?
If you have a peanut allergy, try using almond butter or sunflower seed butter as a substitute. The flavor will be slightly different, but still delicious.
Butterfinger Balls are a fun, easy-to-make treat that combines the crunch of Butterfinger candy bars with creamy peanut butter and rich chocolate. Whether you’re making them for a special occasion or just to satisfy a sweet craving, these bite-sized delights are sure to be a hit. Give them a try and enjoy the perfect combination of flavors and textures!
Did you make this recipe? Share your experience in the comments below and let us know how it turned out!
